
I reviewed Sunbeamtech’s Acrylic HTPC Casing earlier this year and with me today, is another of their acrylic case – this time, the mini-ITX variant. 😀
The Package
As usual, I don’t go into the details of that are already stated on the official product page so I could dive straight into the other details.
Unlike the Acrylic HTPC Casing that I reviewed before that came in multiple panels that requires piece-by-piece assembly, the mini-ITX unit comes fully assembled!

Nice eh? That’s the unit right out of the box. 😀 Let’s have a more detailed look.

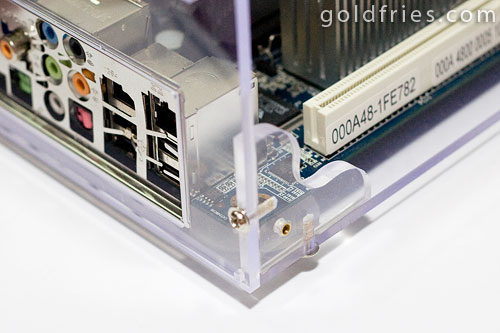
Front panel (above), and back panel.

And here’s what the back of the front panel look like.

Along with the package comes the cable, mounting screws (I love how Sunbeamtech packages the screws into individual packets and labelling them, sorted according to their purpose), the gloves and even the power supply unit.
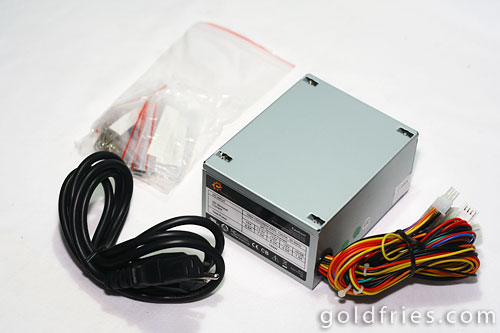
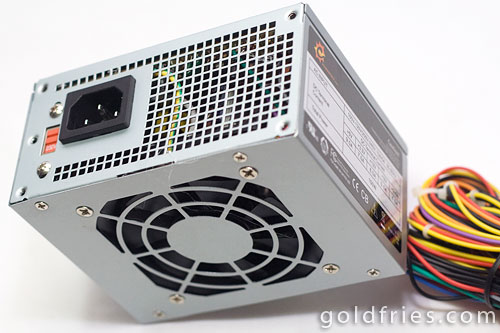
I’m sure some of you would be keen on knowing the PSU ratings, so here it is.

The PSU is simple, no special painted color or anything. It comes with a 90mm fan that’s silent in operation.
Assembly
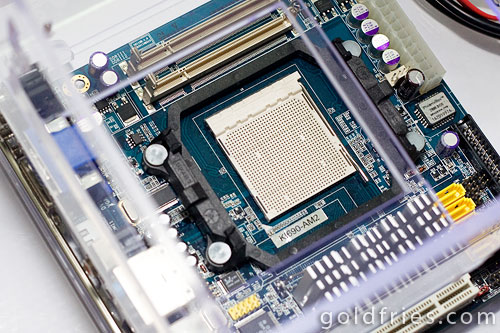
Used in this review is KI690-AM2, a mini-ITX board with AMD690G chipset. Comes with a host of features, and along with this installation is my trusty AMD Sempron LE-1100 (Sparta 1.9GHz 256KB L2 Cache) processor with stock heatsink.
While installing components into a ready-made casing is expected to be a walk in the park, apparently it isn’t so for my experience. Why? SPACE!
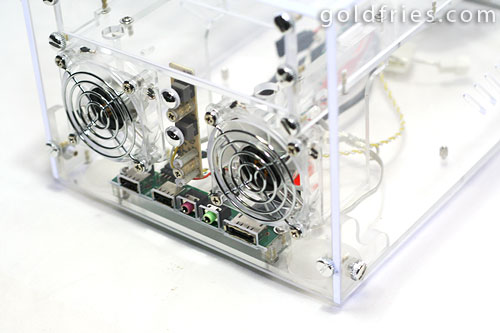
Here’s how it looked like with the board in place.
Getting the board in there was relatively easy since it’s just a matter of angled movements.

The casing fits the board perfectly, just a bit tight on the corners so a longer screw-driver is helpful when it comes to mounting the motherboard.
Things get difficult after the processor and heatsink are mounted on the motherboard. If you look at the images above, you’ll see how tight the space is and while I could easily fit the processor on the socket, I couldn’t possibly mount the heatsink when the board is already in the casing.
Placing the board with heatsink mounted on it took quite some effort, it’s the thought of wanting to get the thing into place but at the same time being careful not to leave scratch marks on the acrylic panels. After numerous attempts, I finally got the board into place without doing any harm to the casing.

Look at how tight is that fit? Here’s another view of how tight it was.

Tight huh? I had no spare SATA hard disks, the IDE hard disk was impossible to use since there’s literally no place for the placement of the IDE connector while the it is still possible to fit the molex unto it. I’m not sure how any SATA hard disk could have sufficient space for cables either, perhaps an L-type SATA cable could do the trick but for the SATA power, I am quite doubtful that it’ll fit either.
Best option? Find an even lower heatsink, clearly the stock heatsink was hogging much of the space.
I wonder if you guys noticed the broken piece of acrylic in one of the photos. Look at the beam near the heatsink, it broke when I was mounting the hard disk – I have no idea how it happened.
Anyway, here’s the 150 mini-ITX PSU compares to an ATX PSU.
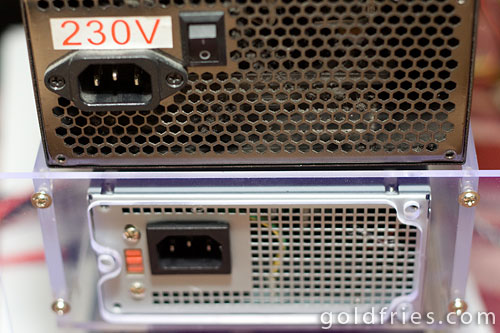
The PSU space is just a little short (by a few mm) of being able to accommodate the width of the ATX PSU.
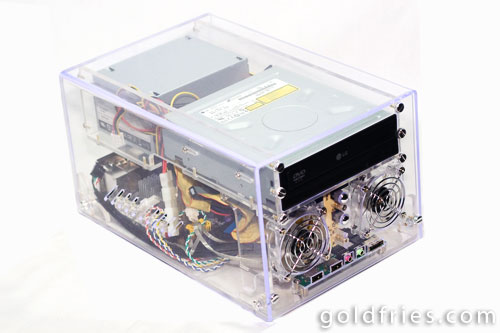
After mounting everything into the mini-ITX casing and a little cable management, here is the finished unit!
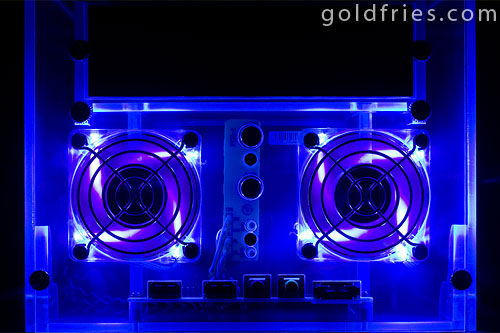
And here’s what it look like in the dark.

Conclusion
It’s a beautiful casing, I like that it’s pre-assembled. I know that Sunbeamtech could’ve just packaged it the way they did on the other casing and we’ll have a good hour or so doing manual reading and screwing around (yes, literally) the panels. 😀 They didn’t, they made the package bigger for the convenience of the buyer – yay!
The only thing I found odd was that the blue LED fans had a purple tinge on it. I have no idea why, it wasn’t blue like the blue LED fans on the HTPC unit.
It’s a good product, but should you get the casing?
Firstly, do you need something mini-ITX? I think something along the likes of Intel® Desktop Board D945GCLF with Integrated Intel® Atom™ Processor would be best, spare yourself the hassle of having to source for low-profile processor heatsink.
Do you like Acrylic and Blue LED? If it’s all a YES then go ahead, it comes with PSU and looks great if you adore blue LED setup. 🙂
The only possible problem to face is finding a replacement PSU should anything happen. 🙁


Very interesting article. Thanks You!!!
I think the std name for the small PSU is SFX-PSU.
When u guy need replacement for it just go to Singapore,
I m asking my cousin to buy me one HEC MINIQ 300w.
http://www.hec-group.com.tw/retail_power_supply/miniq_power/
Cost S$59 ( RM 144.55 @ 2.45 rate )
Ouhh thanks! At least now I know where to get replacement units.
In M’sia damn hard to find, or should I say IMPOSSIBLE……….. unless the Sunbeam distributors carry them. 🙂
More people need to read this and understand this aspect of the story. I cant believe you’re not more popular.