
Should photography newbies learn to post-process? 🙂 That’s one of the areas we’ll look into in this article.
Let me start by explaining POST-PROCESSING : Basically ANYTHING you do to the picture after it reaches your computer is a form of post-processing. It could be a simple as resizing a photo or adding a watermark, or it could be as complex as having multiple layers, clearing, dodging, burning, color adjustments and whatever else to make it look like digital artwork.

Should people do POST-PROCESING? YES. Why leave your photos as it is if post-processing can enhance it? Before the digital era of photography, post-processing was done in the darkroom. So it’s really nothing new.
Remember – post-processing can turn a good photo into a great photo, but keep in mind that it can’t turn shit into gold. If you have a lousy photo, you can just forget about it. Post-processing requires a good base to start with.
So, should photography beginners learn to post-process? NO, at least not at such an infant stage. Resizing and adding watermark is fine of course but as to advanced post-processing like color adjustments and such – I think is better to leave that out for now.
Why so?
A Journey Needs A Destination
If the sub-header above isn’t a good enough hint – let’s make it more simple.
POST-PROCESSING is about achieving a result, a GOOD result. If one does not know what is good color, good tonality, good exposure – how is one going to know what to do with the photo?
You can see it all over Facebook how a decent photo is ruined because the person decides to HDR or apply something he / she thinks is cool color, or because some other beginners who doesn’t know his or her stuff just throws a bad advice to another beginners.
As a start, it’s good to should learn to see the colors AS IT IS. Once you get it right, you can progress to color related post-processing (where most people kill the photo). You could even try to have some presets done in the camera to speed up your work.
*Note : someone who owns better photography gear than you doesn’t mean he or she is one that you should learn from. They could still be just another beginner.
It is a HUGE misconception that photos have to be altered in color in order to look nice, ala Instagram style, which in my opinion is the app that makes many lousy photos look decent. 😛
Every Photography Hobbyists’ Beginning
Photography beginners should start by getting the exposure correct out of the camera, or at least get it close to perfection. Remember, photography is about LIGHT and a badly composed photo that’s properly exposed, is still better than a badly exposed photo, regardless of composition.
While advancing your composition skills, you can start by learning to see whether the photo is properly exposed. You can always look for more experienced people to guide you.
Please avoid HDR until you know what is good HDR photo. Most HDR photos you see over the Internet are horrible ones.
3 Good Post-Processing for Beginners
1. Brightness adjustment – definitely a good way to start in post-processing after you more or less get the idea of what is a properly exposed photo. Remember that camera sensors are not perfect, the camera’s LCD and histogram are a guide but the actual image may actually be a little under or over-exposed.
2. Contrast adjustment – this is usually done after brightness adjustment. Photos often lose contrast after an increase in brightness, so contrast adjustment helps bring the photo back into proper contrast.
3. Cropping – this allows you to improve composition (eg tightening the frame) or just removing distractions.
Advanced Post-Processing
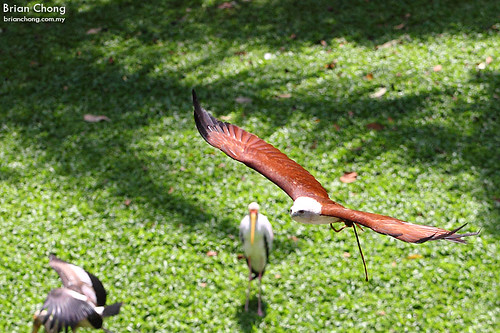
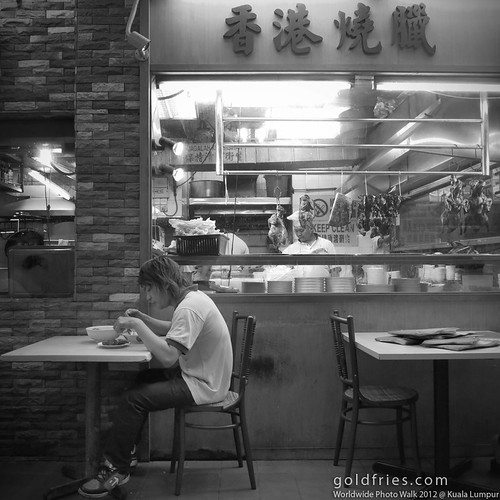
 I’m sure many of you already know that I’m a stock photographer, if you don’t …. well….. I AM ONE. 😛 Have a look at my photos at ShutterStock and Dreamstime.
They look natural, right? Did you know that these photos had undergone post-processing? The post-processing varies, some of them had quite some heavy post-processing to bring out the best of it.
What do we learn from here? Natural looking photos doesn’t mean they are not heavily post-processed. Photos that underwent sever color change and all, doesn’t mean they went through heavy post-processing.
Now, back to advanced post-processing. I do not do HDR, nor do I do those fancy color removal or whatever you call it that’s commonly seen in wedding photography.
I shoot in RAW for photos that I really want to make them nice. I use Canon Digital Photo Professional for white balance and exposure adjustments, and convert froM RAW to JPG conversion. The rest of the post-processing are done with Adobe Photoshop CS3.
 From this point onwards, it’s a mix of various methods to get my picture right.
I use CLONING to remove unwanted elements from the picture, eg dirt on the plate. Such things are often not visible during setup but the sensor captures a lot of details so the process to remove is inevitable.
I also do dodge & burn, that is the process to brighten or darken certain areas to balance out the exposure.
I work with multiple layers, leaving the BASE layer in-tact.
I use brush-tools for dodge and burn. I use brush tool to selective clear the layers. For example a darker layer on top of a brighter layer, and then clear it accordingly with the appropriate opacity to get the balance I want. I use brush tools to make the white background as white as I want.
In some cases, such as my interior photography assignments, I have to distort the layer to get the lines to aligned the way I like it to be.
I will sharpen or add vignetting to my photos if need but usually I don’t. I reserve vignetting for my casual photos or if I wish add more FEEL a captured moment.
Let’s look at the following image that got me a Merit Prize at MPA UK Photography Awards 2011. (just MOUSE-OVER the image below to see the result of post-processing)
And that’s how you turn an average photo into a GOOD photo! It involves multiple exposures, selecting clearning, dodging and burning. The post-process aims to balance exposure from the meeting room and the view outside.
🙂 So there you have it, a glimpse (in text) of the advanced post-processing technique. Maybe I should conduct a workshop.
In the mean time, leave your questions here or you can always find me on Facebook and Twitter, or lowyat.net forum.
For photo-editing software, please read my article on Free Photo Editing Software. Picnik is DEAD by the way.


One thought on “Beginner Photography : Post-Processing”
Comments are closed.